| CourseLab 3.5. User's Guide |  |
 |
| CourseLab 3.5. User's Guide | |
|
To interrupt relocation of the object, press Esc key.
 |
Move Up. Selected object will be moved one position up. Command is available by pressing button from the toolbar panel. |
 |
Move Down. Selected object will be moved one position down. Command is available by pressing button from the toolbar panel. |
 |
Move Left. Selected object will be moved one position to the left. Command is available by pressing button from the toolbar panel. |
 |
Move Right. Selected object will be moved one position to the right. Command is available by pressing button from the toolbar panel. |
The above mentioned methods can be also employed for moving multiple objects. Allocation of selected objects in relationship to each other will remain unchanged.
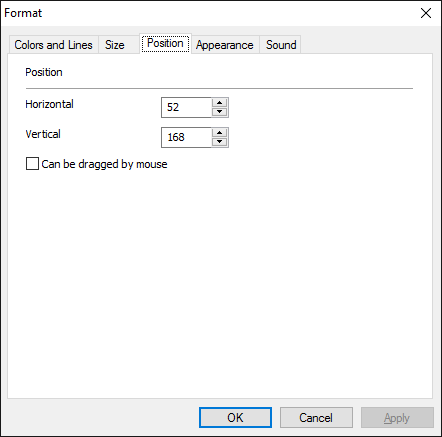
You can also use Format dialog window to position multiple selected objects simultaneously. When dialog window is opened, the Horizontal and the Vertical fields will be populated with the values, only if these values are identical for all selected objects. If you leave the field empty, corresponding co-ordinate will remain unchanged for each object. If you enter the value, all selected Objects will change position according new co-ordinate's value.
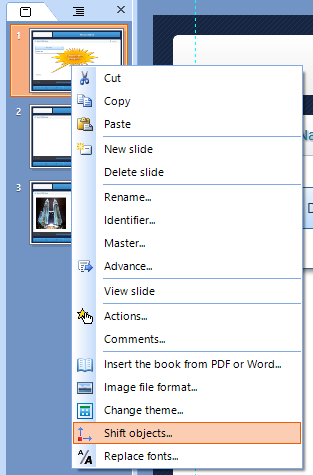
command is also available from the Object's context menu in the Frame Structure section of the Tasks Panel.
You can cause the Object to be dragged by the mouse when the checkbox Can be dragged by mouse is on the same tab – in this case, learner can drag the specified Object within a frame.
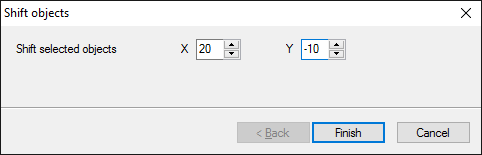
All Objects of the Slide (or Module) can be shifted horizontally or vertically. This option could be very useful when the basic layout of the Slide has been changed (for example, when Master-Slide has been changed).
To shift the Objects right click on the Slide icon in the Module Pane (or on the icon of the Module in the Course Pane) and select option in context menu.
In the dialog window select the values for horizontal and vertical shift and apply change.