| CourseLab 3.5. User's Guide |  |
 |
| CourseLab 3.5. User's Guide | |
|
To make exact positioning of the Objects easier you can use Guides and Grid.
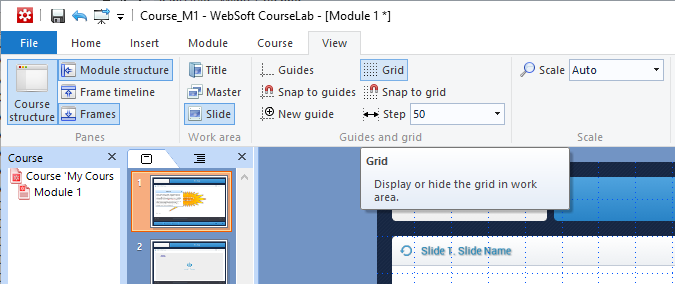
Grid consists of thin dotted lines, which drawed vertically and horizontally. To toggle the grid display press the button in the group of the View tab. In classic menu press button on toolbar. To change the grid step select appropriate value from the menu or enter custom value.
Unlike the grid Guides can be added to any position on the Slide. Guides allow to mark up the workarea to provide exact positioning of the Objects. To toggle the Guides display press the button in the group of the View tab. To add new Guide press the button in the same group - Guide Properties dialog window will be open.
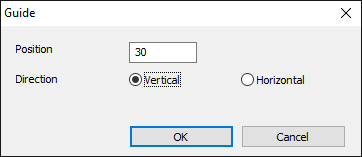
Define Guide's direction and position (in pixels) and press OK. Guide line will appear at desired position. You can change these parameters later - this dialog window can be opened from Guide context menu. To delete the Guide click on it with right mouse button and select corresponding option in context menu.
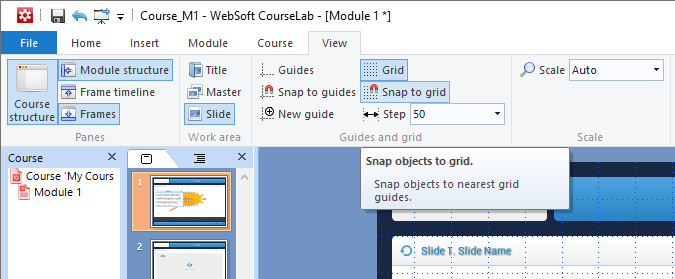
Sometimes it could be useful to activate snapping of the Objects to grid or to guides. In case this option is selected the Object will snap to grid or guide lines (i.e. automatically move to the closest lines). To allow snap to guides or grid press corresponding button in the group of the View tab. In classic menu press corresponding button on Instrument Panel.
You can change Guide color and tolerance on the Guides tab of the CourseLab dialog.
